Do you want to add drop shadows to elements in your PowerApps without using images?
PowerApps does not provide an OOB property to set shadows for elements or controls but you can use the HTML text control to add html with custom styles to implement the desired shadow effect.
SVGs are another great way to generate custom icons, images, shadow effects, animations and much more. I love going the SVG route for animation effects and complex visuals as such. In this post we will walk through a simple html-css trick for adding effects to your app elements without the need for images.


CSS3 ‘box-shadow’ property allows designers to easily implement drop shadows on elements by specifying values for color, size, blur, spread and offset. The basic syntax for creating a box shadow is:
box-shadow: x-offset y-offset blur spread color;The offset and radius values can have positive or negative values
- x-offset: Positive value for shadow on the right and negative value for shadow on the left
- y-offset: Positive value for shadow below the element and negative value for shadow above the element
- blur (optional): Larger the value bigger the blur radius.Zero (0) creates a sharp shadow. The color will diffuse from opaque to transparent
- spread (optional): Defines how much the shadow should grow
- color: Sets the color of the shadow
To create a box with drop shadow, insert a HTML text control on the screen and set the HtmlText property of the control with the following div content.
Note: The ‘border-radius’ property sets the rounded edges for the div box. And the ‘margin’, ‘width’ and ‘height’ properties can be set to values as desired.
"<div style='margin:10px;width:190px;height:150px;background-color:#;box-shadow:0 3px 6px 1px #ccc; border-radius:15px'></div>"
Below are a few variations of box shadows you can achieve by playing around with the values that go into that property:
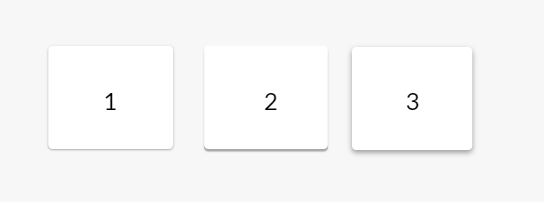
Also, here’s a free box shadow css generator where you can quickly try plugging in different values/variations and generate css declarations.
Hope this was useful and I can’t wait to see how you amplify your apps with this simple design tip. Happy PowerApp-ing!
Follow me on twitter and the blog for more tips & tricks.

Geetha, nice work here. I did not realize you could do this and have been actively searching for box shadow solution in powerapps.
LikeLiked by 1 person
Glad you found it helpful!
LikeLike
Hello Geetha,
thank you for this great article, I just watched a video of April Dunnam at the Ignite and came along your App which looks amazing, and opens a whole new world for me 🙂
I wondered if theres some step-by-step tutorial on how to build the screen thats displayes here?
That would be awesome.
LikeLiked by 1 person
Glad this is helpful. Thanks for the suggestion! I’ll plan on a more elaborate post to walk through the build.
LikeLike
Howdy just wanted to give you a quick heads up. The text in your post seem to be running off the screen in Firefox. I’m not sure if this is a format issue or something to do with browser compatibility but I thought I’d post to let you know. The design look great though! Hope you get the issue fixed soon. Many thanks
LikeLiked by 1 person
Thanks for letting me know!
LikeLike
This Drop Shadow trick is supreme – makes everything look good with light weight. Thank you! By the way, do you have or know of a Leave Application Power App that you are showing in the screenshots above? (or similar)
LikeLiked by 1 person
Yes, it does help enhance the default look and feel. There’s a leave request application that you might find helpful: https://powerapps.microsoft.com/en-us/blog/create-and-manage-leave-requests-with-ease/
LikeLike
So much easier & quicker than the SVG approach! Fantastic
LikeLiked by 1 person
Really nice work. Would you mind sharing the sample app from your screenshots?
LikeLike
Thanks Andy! Here’s a sample Power App with the base elements configured you could import and extend based on your needs: https://github.com/GSiVed/Power-Apps/blob/master/HTMLCtrlTricks.zip
LikeLike
Hi Geetha,
Many thanks for sharing this great tip, I found your site after wathcing your Power Platform Community presentation yesterday.
How did you get the “Text” or numbers in your case aligned vertically inside the Shadow box? If you could kindly share the code that would be most appreciated. I look forward to more posts and presentations from you. I’ve been well impressed with what I have seen so far.
LikeLiked by 1 person
Thank you! It’s a label control overlay on the box with centered text alignment. Here’s a sample Power App you can import and extend based on your needs: https://github.com/GSiVed/Power-Apps/blob/master/HTMLCtrlTricks.zip
LikeLike
Amazing! Thank you so much for helpful advice, waiting for next articles 🙂
LikeLike
html base component
1. Shadow box
2. Background Color Change
3.Graident Color, Gradient Direction, Gradient Color Input
4.Border , Border Type, Border Color, Border Width
5.Border Radius with all Separate Corner Value
6.Margin property with all 4 separate view
7.Shadow property with Shadow color , X and Y Value, blur & spread
8.Button – Shadow Box Turn to html Base Button with all Shadow Box Properties
link:-
github – https://github.com/kumaraman0031/Powerapps-ShadowBox
LikeLike
You’ve been a big help to me. Thank you!
LikeLike
Thanks for your help and for posting this article. It’s been great.
LikeLike
Thank you for being of assistance to me. I really loved this article.
LikeLike
Pingback: 5 Power Apps Gallery Design UX Tips
Very useful and easy explanation. Thank you
LikeLike